
Tilapia gets a bad rap for being bland, and blackened tilapia is how you prove that wrong. A rub of paprika, cayenne, and a few pantry spices bakes into a dark, smoky crust that gives plain fillets a lot more flavor. I make it on weeknights, usually whenever I catch the fillets on sale at Walmart, and it is done in under twenty minutes

True blackening means a screaming-hot cast-iron skillet and a smoke alarm going off mid-dinner. Mine skips all that. You still get a deep, spiced crust, but the fish bakes quietly in the oven and stays soft and flaky underneath.
If oven fish is your thing, I also keep a baked lemon butter tilapia and a parmesan garlic crusted tilapia in rotation.
What is Blackened Tilapia?
Blackened tilapia is fish coated in a dry spice rub and cooked over high heat until the seasoning chars into a dark crust. The blackening method comes from Cajun cooking in 1980s Louisiana, made famous by chef Paul Prudhomme, who first blackened redfish in a smoking-hot cast-iron skillet.

Tilapia works well here because it is mild and picks up the seasoning quickly. This oven version gives you that dark crust without filling your kitchen with smoke.
Ingredients in Oven Baked Blackened Tilapia

- Tilapia fillets – Mild white fish that cooks fast and takes the seasoning well. Thawed frozen fillets are fine, just pat them dry. Any thin white fish like basa or cod works as a swap.
- Paprika – The base of the rub and most of the color. Smoked paprika is a great swap if you want a deeper, charred flavor in the crust.
- Cayenne pepper – The heat. It is optional, so leave it out for a milder, kid-friendly plate or double it if you like things hot.
- Garlic powder – Mellow, even garlic flavor that toasts into the crust instead of burning the way fresh garlic would.
- Onion powder – A little sharpness behind the paprika. Hard to find? Grate a little fresh onion, or use onion salt and cut back the added salt.
- Ground black pepper – Earthy bite that rounds out the heat.
- Dried parsley flakes – A little herb flavor and some color in the dark crust.
- Cooking oil spray – Helps the rub stick and gets the surface to darken and firm up in the oven.
How to Make Oven Baked Blackened Tilapia
Mix the Rub
The rub gives the fish its dark color and most of its flavor, so I like mixing it well before it goes on the fillets. Just mix everything in one small bowl.


- Combine the paprika, cayenne, onion powder, garlic powder, salt, black pepper, and parsley flakes in a small bowl.
- Stir until everything looks evenly mixed.
Season the Fillets
Patting the fish dry helps the seasoning stick. It also keeps the fillets from steaming in the oven.
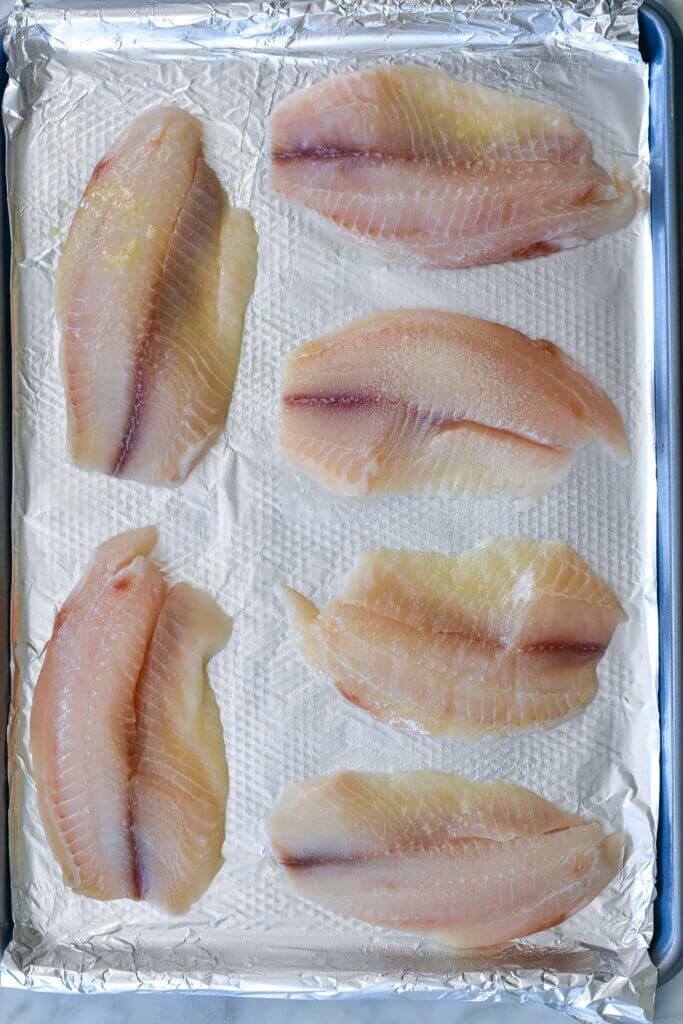

- Pat the tilapia fillets dry on both sides with paper towels.
- Spray each fillet lightly with cooking oil.
- Rub the spice mix over one side, flip, and coat the other side with the rest.
Bake Until the Crust Darkens
The oven needs to be hot because tilapia cooks fast. That helps the seasoning darken before the fish has a chance to dry out, so set a timer and stay close.


- Preheat the oven to 400°F (200°C). Line a baking tray with foil and spray it with oil.
- Arrange the fillets on the foil and give the tops one more light spray of oil.
- Bake for 12 to 14 minutes, until the fish flakes easily with a fork and reaches 145°F at the thickest part.
Rest and Serve
Let the fish rest for a couple of minutes so it is easier to move to the plate.
- Pull the tray out and let the fillets rest for 2 minutes.
- Finish with a squeeze of fresh lemon and serve hot.
Want to see the rub and the bake in real time? Here is the quick video walkthrough.
Once you make this, you will probably remember the steps next time, and you will not need to measure the rub so carefully.
Tips
- Buy even-thickness fillets – They cook at the same rate, so they all finish together. If the fillets are different sizes, the thinner ones can dry out before the thicker ones finish cooking.
- Use fresh paprika and cayenne – Spices fade in the pantry. Old spices will not give you the same color or flavor.
- Do not skip the oil spray – It helps the seasoning stick and brown in the oven. Without it the crust turns powdery and dull.
- Give the fillets room – Leave a little space between the fillets so the heat can move around them. Without room, they steam instead of browning.
- Line the tray with foil – It keeps the dark rub off your pan, so cleanup is a wipe instead of a scrub.
- Serve it right away – The crust is at its best straight from the oven and softens as it sits.

What to Serve with Blackened Tilapia
I like serving this with simple sides because the seasoning already has a lot of flavor.
- Easy Cucumber Salad – The cool cucumber and light vinegar dressing balance the spice from the fish.
- Chickpea Salad – A heartier cold side that makes the meal more complete.
- Bacon Wrapped Asparagus – Salty and savory, and it roasts in the same oven while the fish bakes.
- Rice or quinoa – A plain grain soaks up the lemon and any rub that flakes off. Quinoa is my pick when I want more fiber.
- Roasted vegetables – Use whatever vegetables you already have in the fridge. They share the oven and round out the meal with no extra pots.
Storage and Reheating
Let the fish cool, then keep it in an airtight container in the fridge for 2 to 3 days. For longer, freeze the cooled fillets wrapped well for up to 2 months. Reheat gently in a 300°F oven so it warms through without drying out. I skip the microwave here, it turns the fish rubbery.
More Fish Recipes to Try
If you like easy fish dinners, these are a few more recipes I make often.
- Baked Ginger Glazed Mahi-mahi – Another oven fish recipe, this time with ginger and honey.
- Fish Ceviche – No oven at all. Citrus does the cooking, which is my move on hot days.
- Sweet and Sour Fish – A saucier option when you want something with more flavor.
- Bacon Wrapped Shrimp with Cream Cheese Stuffing – When I want seafood that feels a little more like a party.

Frequently Asked Questions
Can I use smoked paprika instead?
Yes. Smoked paprika gives the crust a deeper, charred flavor that is closer to true pan-blackened fish. Swap it one-for-one for the regular paprika.
Can I add tomatoes and olives?
Yes. Scatter halved cherry tomatoes and sliced olives around the fillets before baking. They soften in the same 12 to 14 minutes and make it more of a one-tray meal.
What temperature is tilapia done at?
Tilapia is fully cooked at an internal temperature of 145°F. Without a thermometer, go by feel: it flakes easily with a fork and looks opaque all the way through.
Can I use frozen tilapia fillets?
Yes, just thaw them first and pat them very dry. Extra water keeps the rub from sticking and steams the fish instead of letting the crust darken.
Can I make this less spicy?
Yes. Leave out the cayenne pepper or use only a small pinch. The paprika, garlic powder, onion powder, and black pepper will still give the fish good flavor.
If you make this blackened tilapia, tell me how it went in the comments, and let me know if you bumped up the cayenne.

Oven Baked Blackened Tilapia
Ingredients
- 6 tilapia fillets, approximately 3/4 lbs total weight
- cooking oil spray
- 2 1/2 tablespoons paprika
- 1 teaspoon salt
- 1 teaspoon onion powder
- 1/2 teaspoon ground black pepper
- 1 teaspoon garlic powder
- 1/4 teaspoon Cayenne pepper powder, optional
- 1 tablespoon dried parsley flakes
Instructions
- Pat dry the tilapia fillets using a paper towel. Set aside.6 tilapia fillets
- Combine paprika, Cayenne pepper, onion powder, garlic powder, salt, ground black pepper, and parsley flakes in a bowl. Mix well.2 1/2 tablespoons paprika, 1 teaspoon salt, 1 teaspoon onion powder, 1/2 teaspoon ground black pepper, 1 teaspoon garlic powder, 1/4 teaspoon Cayenne pepper powder, 1 tablespoon dried parsley flakes
- Spray cooking oil on each tilapia fillet and then rub with the paprika mixture. Turn the fillet over and rub the remaining mixture on the other side.cooking oil spray
- Preheat the oven to 400F.
- Lay an aluminum foil over a baking tray. Spray cooking oil on the foil and arrange the fillet on top. Spray some cooking oil on the tilapia fillet.
- Bake for 12 to 14 minutes or until the fish is done and flaky.
- Serve hot. Enjoy!

Recipe Notes
- Spice level – If you like your food to be on the spicy side, this is the dish for you! This definitely has elements of heat to it, but not too much to the point that it takes away from the savory flavor of the fish.
- Sweetness level – Now should you like some sweetness to your ulam, this may not make you very happy. Saltiness and spiciness definitely dominate in this tilapia recipe.
- Cayenne pepper powder – Not everyone likes spicy food, and so you may be able to cater to more people by removing the cayenne pepper powder. Remember that this is an optional ingredient that we can omit or have less of if we are looking to adjust the heat.
- Onion powder – It may be a struggle to get your hands on onion powder, and so instead, you can try mincing or grating your onion instead. Other good substitutes would be garlic powder and onion salt.


Leave a Reply